As someone passionate about wholesome recipes and fermentation, I’ve always found the apple cider vinegar recipe both fascinating and rewarding. Making it at home connects me with tradition, nature, and nutrition in a truly satisfying way.
In this blog, I’ll guide you step-by-step through everything I’ve learned and experienced when making apple cider vinegar from scratch, using everyday apple scraps and a bit of patience.
Is Apple Cider Vinegar Used for Weight Loss?

The buzz around apple cider vinegar (ACV) for weight loss is hard to ignore. While I always stress the importance of balanced eating and exercise, it’s undeniable that many people swear by the effects of ACV in their weight-loss journey.
ACV may support weight loss by:
- Helping improve digestion and metabolism
- Stabilising blood sugar levels
- Reducing appetite when taken before meals
From my own research and personal experience, it’s not a miracle solution, but incorporating 1–2 tablespoons of homemade apple cider vinegar into your routine might help regulate cravings and digestion, two things I often struggle with during winter months.
Scientific studies are ongoing, and I recommend caution and moderation. ACV is acidic, so always dilute it when consuming directly, and speak with a healthcare professional if you have underlying conditions.
Ingredients for a Homemade Apple Cider Vinegar Recipe
When I first attempted this recipe, I was surprised by how few ingredients I needed. Here’s a table that lists all you need to get started:
Ingredients Table
| Ingredient | Quantity | Specification |
| Apple scraps (peels & cores) | From 5–7 apples | Organic, fresh |
| Sugar or honey | 1–2 tablespoons | Optional but speeds fermentation |
| Filtered water | Enough to cover apples | Chlorine-free |
| Starter vinegar | 2 tablespoons | Raw, unpasteurised ACV (optional) |
| Glass jar | 1 large | Sterilised, wide-mouth preferred |
| Cheesecloth or muslin | 1 piece | To cover jar |
| Rubber band | 1 | To secure cloth |
From my trials, using sweet apples like Gala or Fuji yielded better results due to higher sugar content. Honey instead of sugar gave the batch a slightly richer flavour, but both worked well.
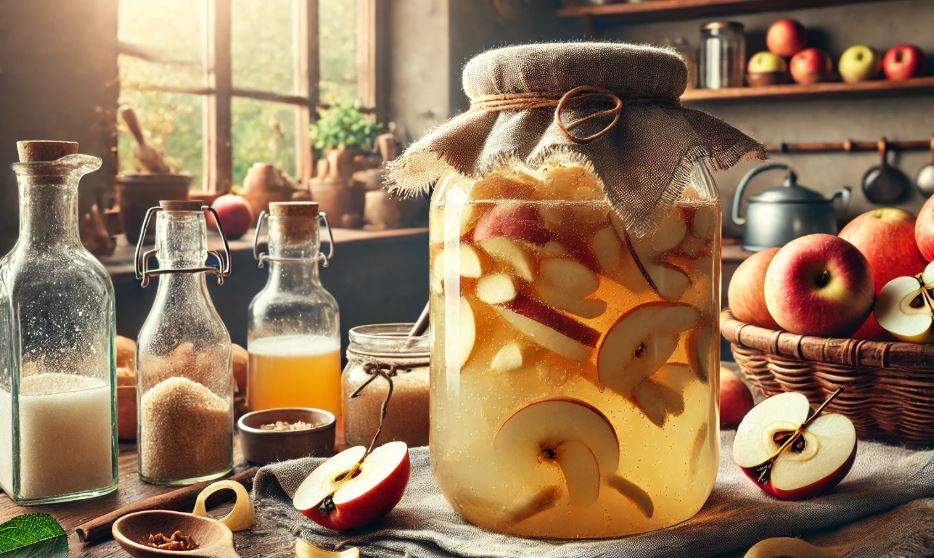
How to Make Apple Cider Vinegar?
Making apple cider vinegar at home is surprisingly easy and cost-effective. I’ve done it many times using leftover apple scraps, and the result is a rich, raw vinegar that’s both healthy and flavourful.
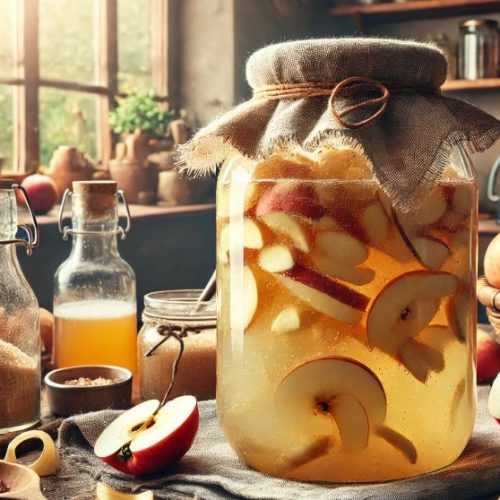
1. Prepare the Apples
- Collect the peels and cores from 5–7 apples. You can use whole apples too, chopped into chunks.
- Place the scraps in a clean, wide-mouth glass jar, filling about three-quarters of the jar.
2. Add Sweetener
- Dissolve 1–2 tablespoons of sugar or honey in a cup of filtered water.
- Pour over the apple scraps until they’re completely submerged.
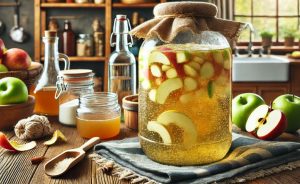
3. Cover and Ferment
- Cover the jar with a breathable cloth (like cheesecloth or muslin) and secure with a rubber band.
- Leave the jar in a warm, dark place (around 20–25°C) for 2–3 weeks.
- Stir daily to prevent mould and promote even fermentation.
4. Strain the Liquid
- After two weeks, strain out the apple solids and discard them.
- Return the liquid to the jar and cover it again with the cloth.
5. Secondary Fermentation
- Let the strained liquid sit for another 2–4 weeks.
- Taste occasionally. Once it has a strong vinegar tang and slight cloudiness (the “mother”), it’s ready.
6. Store the Vinegar
- Pour into a clean bottle with a lid and store in a cool, dark cupboard.
- It can last up to a year, especially if raw and unfiltered.
Can I Make Apple Cider Vinegar Without Using a Starter Culture?
Yes, and I often do. Using a starter culture like store-bought raw ACV can speed things up, but it’s not necessary. Apples naturally contain wild yeasts and bacteria on their skins, which are enough to kick-start fermentation.
What I Do When Skipping the Starter?
- Choose organic apples to avoid pesticide interference.
- Make sure the peels are fresh and clean.
- Allow natural fermentation to happen over 2–4 weeks.
Advantages of Natural Fermentation
- Authentic taste
- Richer “mother” formation
- More control over the process
I’ve found that even without a starter, patience pays off. Just make sure to stir the jar every day and keep it at a stable room temperature (20–25°C).
How Long Does It Take to Ferment Apple Cider Vinegar at Home?
Fermentation is a two-step process and typically takes 4–6 weeks in total, depending on your environment.
- Days 1–7: Apples ferment in sugar water, bubbling actively
- Weeks 2–4: Strain out solids, and allow liquid to ferment further
- Week 5 onwards: Vinegar smell intensifies, and acidity sharpens
You’ll know it’s working if:
- It develops a sour, vinegary scent
- You notice the “mother” forming (cloudy strands or film)
- There’s no mould or foul smell
I usually taste it around week 4 and let it go longer if it needs more punch.
What Are the Best Apples to Use for an Effective Apple Cider Vinegar Recipe?
The apples you use truly define the final flavour and strength of your ACV. I’ve experimented with many varieties and found that sweeter apples ferment faster due to their higher natural sugar content.
My Top Choices
- Gala, Fuji, Pink Lady – sweet and ferment well
- Granny Smith – tangy, ideal for balancing blends
- Red Delicious – mild, works well with spices
Mixing varieties creates complexity in flavour. I often mix 3 types for depth. Avoid bruised or rotten fruit, as it affects the quality and safety of your final product.
How Do I Know When My Homemade Apple Cider Vinegar Is Ready?
Patience is key. Here’s how I check for readiness:
Key Indicators
- Smell: It should smell distinctly vinegary, sour, not rotting
- Taste: Should have a sharp, acidic taste similar to store-bought ACV
- Appearance: Clear or slightly cloudy with floating “mother”
- pH level: Typically between 2.5 and 3.5
I personally use pH strips for accuracy, but taste is usually the best indicator for me.
What Is the Difference Between Filtered and Raw Apple Cider Vinegar?
When I bottle my vinegar, I always choose raw and unfiltered, because that’s where the real benefits lie.
Filtered ACV
- Clear, pasteurised, no “mother”
- Long shelf life
- Less beneficial bacteria
Raw ACV
- Cloudy with live “mother”
- Full of probiotics and enzymes
- Stronger taste, shorter shelf life
Filtered versions are often used for cleaning and recipes where clarity matters. Raw is ideal for health use and internal consumption.
What Are the Most Popular Variations of the Apple Cider Vinegar Recipe?
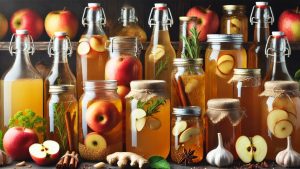
Over time, I started exploring ACV variations. These additions boost flavour and bring in health benefits.
Common Variations
- Spiced ACV: Cinnamon, cloves, ginger
- Honey-infused ACV: Natural sweetness and soothing for sore throats
- Herbal vinegar: Rosemary, thyme, or mint
- Citrus zest vinegar: Lemons or oranges added during fermentation
Notable Chef Recipes
Jamie Oliver’s Spiced Apple Cider Vinegar
- Infused with cinnamon, star anise, and orange peel
- Used in dressings and glazes
Martha Stewart’s Apple Cider Vinegar Tonic
- Combines ACV with lemon, ginger, and honey
- Designed as a morning tonic
Nigel Slater’s Traditional Fermented Apple Vinegar
- Made purely from apples, no sugar
- Slow-fermented for robust flavour
Alice Waters’ Organic Apple Scrap Vinegar
- Entirely zero-waste using peels and cores
- Emphasis on local, organic fruit
Yotam Ottolenghi’s Herbal-Infused Apple Vinegar
- Includes thyme and pink peppercorns
- Perfect for Mediterranean-style marinades
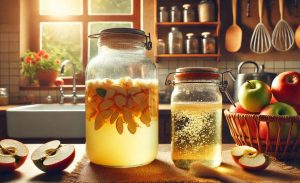
What Containers Should I Use to Make and Store Apple Cider Vinegar Safely?
I learnt early that container choice affects fermentation success.
Ideal Container Options
- Glass jars: Non-reactive, easy to sterilise
- Ceramic crocks: Great for large batches
- Avoid metal and plastic: Can leach or disrupt fermentation
Storage Tips
- Use a cloth and a rubber band instead of a lid during fermentation
- Store in a cool, dark place
- After fermentation, use airtight bottles
Sterilising all equipment beforehand reduces contamination risks.
Can I Reuse the Apple Vinegar Mother for Future Batches?
Absolutely, and I always do. Once you’ve made your first successful batch, the “mother” becomes a reusable asset.
To reuse the vinegar mother:
- Save a few tablespoons of vinegar with the mother
- Add to your next batch as a starter
- Speeds fermentation and improves consistency
I store my mother in a small jar in the fridge when not using it immediately. It remains active for months.
Nutritional Breakdown of Homemade Apple Cider Vinegar (Per Tablespoon)
| Nutrient | Amount |
| Calories | 3 kcal |
| Total Carbohydrate | 0.1 g |
| Sugar | 0.04 g |
| Acetic Acid | 5–6% |
| Potassium | 11 mg |
| Probiotics & Enzymes | Trace (if raw) |
Conclusion
In conclusion, crafting your own apple cider vinegar recipe at home is not only simple but also deeply rewarding. With just a few ingredients and a bit of time, you can produce a natural, raw vinegar that supports health and reduces kitchen waste.
Whether you’re using it for wellness, cooking, or cleaning, homemade ACV offers unmatched quality and satisfaction. Give it a try, you’ll likely never go back to store-bought again.
FAQs
How do I prevent mould in homemade apple cider vinegar?
Ensure all tools are sterilised, apples are submerged under liquid, and the jar is covered with breathable cloth. Stirring daily helps too.
Can I use whole apples instead of scraps?
Yes, whole apples can be used. Just chop them into chunks. However, scraps are great for zero-waste fermentation.
How do I store finished apple cider vinegar?
Store in an airtight glass bottle in a cool, dark cupboard. It keeps well for up to 1 year if raw and longer if filtered.
Does homemade ACV need refrigeration?
No, refrigeration is not required. In fact, it can slow down the probiotic activity. Just keep it in a stable environment.
Can I make vinegar from apple juice?
Yes, but ensure the juice is pure, without preservatives. It ferments faster but needs more monitoring.
Apple Cider Vinegar Recipe
Ingredients
- 5–7 Apples peels & cores
- 1–2 tbsp Sugar or honey Optional but speeds fermentation
- Filtered water Enough to cover apples
- 2 tbsp Starter vinegar unpasteurised ACV (optional)
- 1 large Glass jar Sterilised wide-mouth preferred
- 1 piece Cheesecloth or muslin To cover jar
- 1 Rubber band To secure cloth
Instructions
- Collect the peels and cores from 5–7 apples. You can use whole apples too, chopped into chunks.5–7 Apples
- Place the scraps in a clean, wide-mouth glass jar, filling about three-quarters of the jar.
- Dissolve 1–2 tablespoons of sugar or honey in a cup of filtered water.1–2 tbsp Sugar or honey, Filtered water
- Pour over the apple scraps until they’re completely submerged.
- Cover the jar with a breathable cloth (like cheesecloth or muslin) and secure with a rubber band.1 piece Cheesecloth or muslin, 1 large Glass jar
- Leave the jar in a warm, dark place (around 20–25°C) for 2–3 weeks.
- Stir daily to prevent mould and promote even fermentation.
- After two weeks, strain out the apple solids and discard them.
- Return the liquid to the jar and cover it again with the cloth.
- Let the strained liquid sit for another 2–4 weeks.
- Taste occasionally. Once it has a strong vinegar tang and slight cloudiness (the “mother”), it’s ready.2 tbsp Starter vinegar
- Pour into a clean bottle with a lid and store in a cool, dark cupboard.1 Rubber band